PaperMakes
Main menu:
Making the Models
SOME USEFUL TIPS FOR MAKING PAPERMAKES MODELS...
PaperMakes model designs are ingenious and simple - yet the models have real curves and tension!
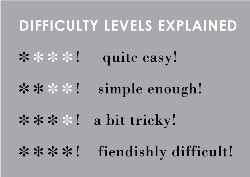
1. Each model has a difficulty level (see opposite). We recommend you start with one of the easier levels first.
2. The models are held on to the sheets with tiny 'bridges' of card. When pressing out the pieces you need to be careful not to tear the model.
3. Each pack includes step-by-step instructions, plus a photograph of what the finished model will look like once completed.
4. The models are constructed with the aid of tabs and slots so you shouldn't need to use glue, though occasionally you might need to use some sticky tape.


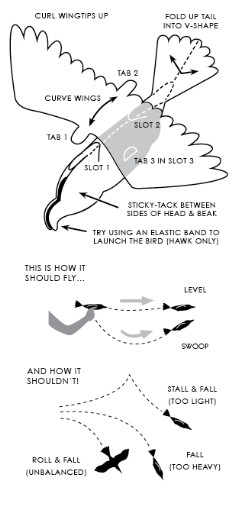
5. It's a good idea to curve some of the shapes realistically, eg the legs and especially the birds' wings (see below).

How to Fly the Flying Bird Models...
Each model pack that says 'flying bird model' does just that! They really are designed to fly so long as you follow the instructions.
1. The instruction sheet will show you how to construct the bird model: firstly by attaching the wings to the body, then adding some sticky-tack between the head and beak, and finally folding the sides of the body together.
2. To fly correctly, the tail must be folded up in a V-shape (see diagram). The sticky-tack provides weight and balance - too much and it will fall, too little and it will stall. Adjust the amount you use when trying to fly the bird.
3. It's important that the curve of the wings (a sort of 'aerofoil' cross-section) and shape of the head and tail should be symmetrical and balanced. By looking at the model from all sides you will spot any distortion. Don't be afraid to flex the curve of the wings, body and tail - and remember to curl up the wingtip feathers.
4. Experiment with the trimming while doing test flights.